Asian Cultural Clothing: Dressing my 18" Twinns Part III

In Part II of Dressing my 18" Twinns, I talked about cobbling together an 18" pattern for a Hanfu style dress for my Twinn Cai. Meanwhile, in this final chapter to what's been a slightly epic project, the last of my 18" Twinn rescues, Pearl, gets her Asian cultural clothing and hairstyle. This is a fun and exciting moment for a project that began several years ago and finally concludes with a Thai-themed outfit for Pearl.
Selecting which Asian culture Pearl would represent was not an easy choice, but I was repeatedly drawn to the gorgeous, traditional clothing of Thailand. In truth, I didn't think I would be able to find Thai clothing for an 18" doll (I couldn't even find Hanfu clothing) so I had to start learning a bit about the different Thai styles and deciding how I would make my own.
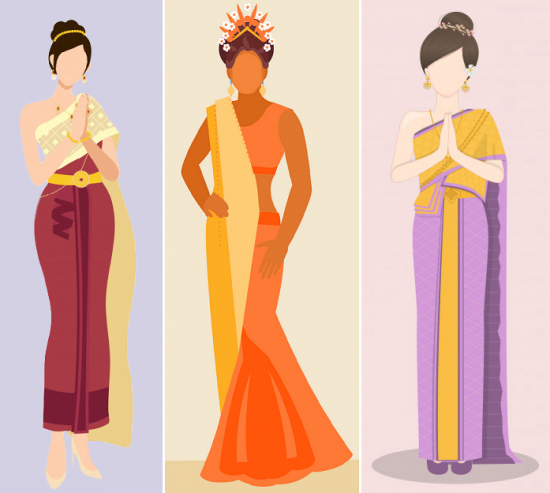
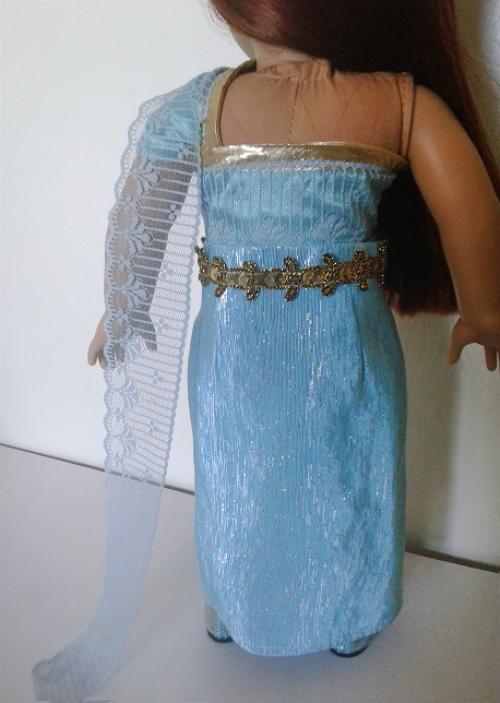
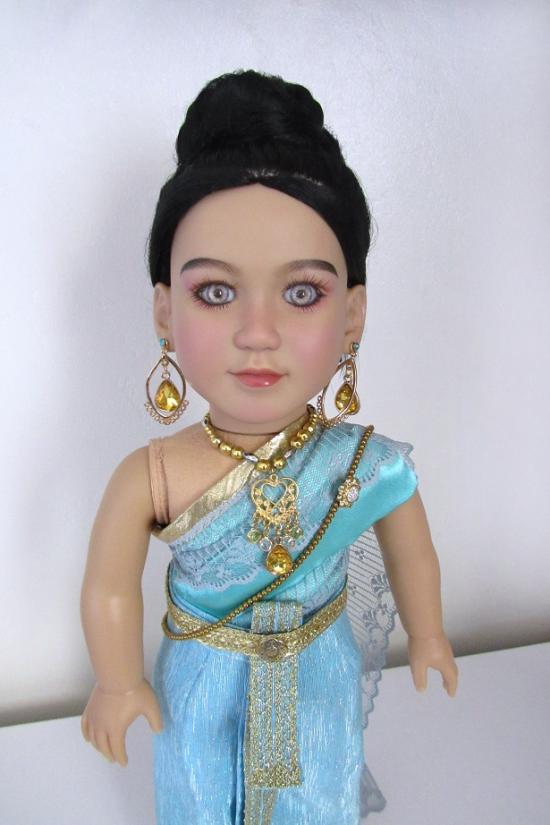
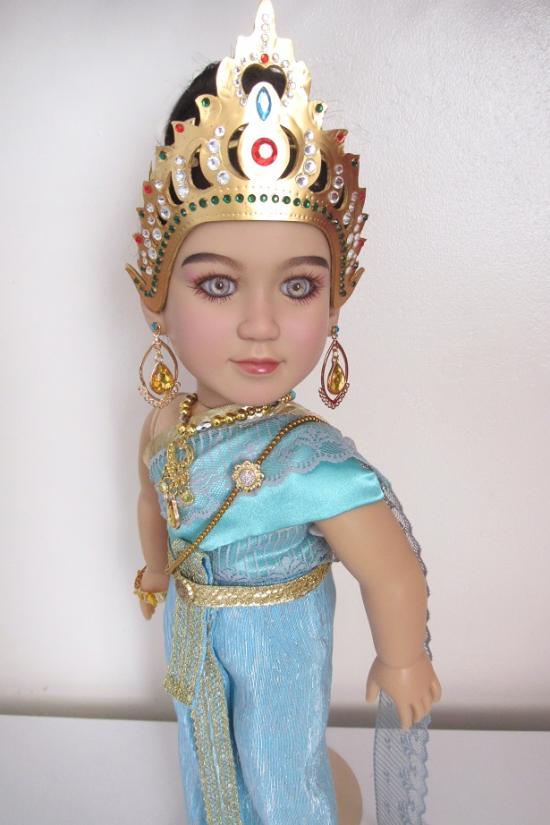
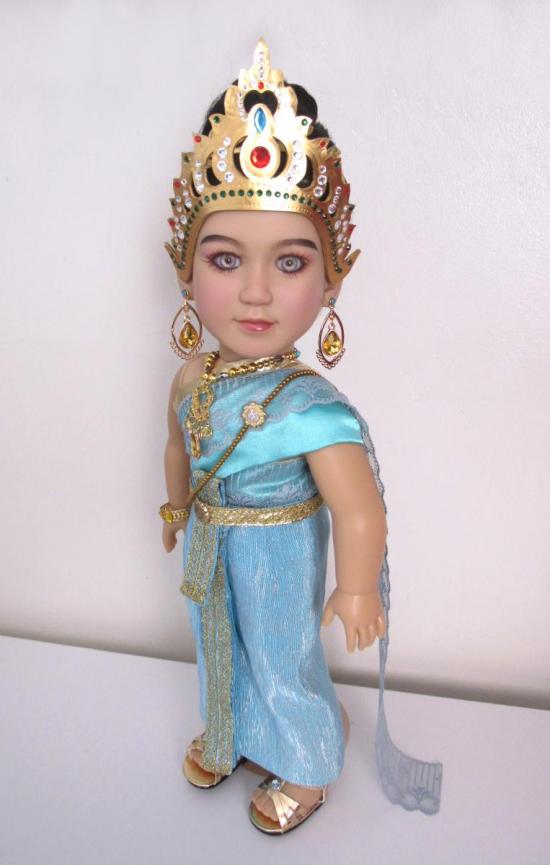
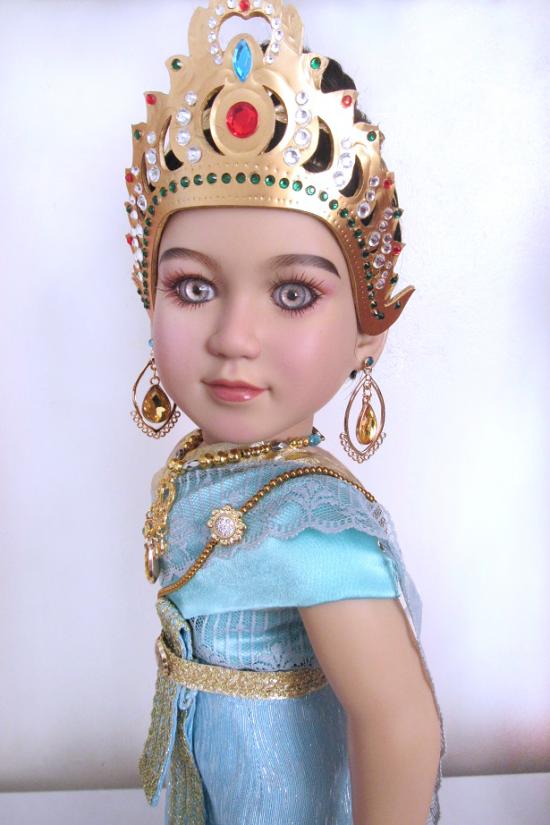
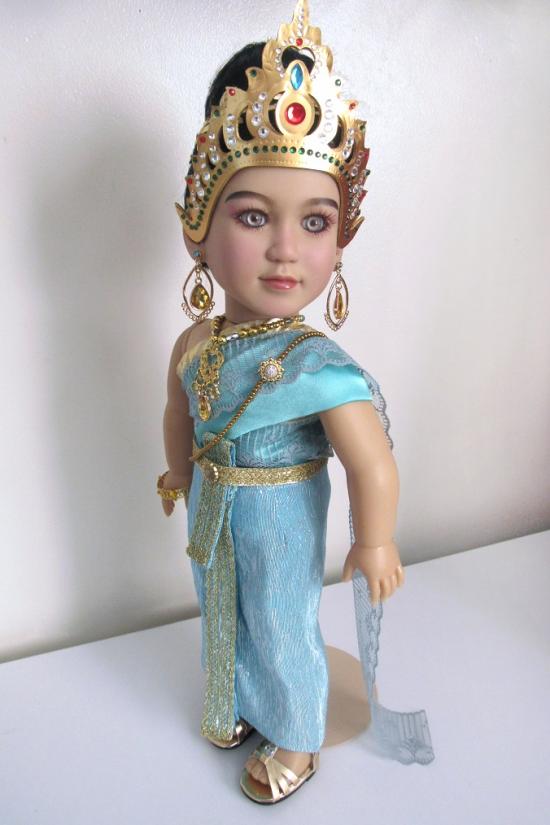
Traditional Thai clothing is called Chut Thai, which simply means "Thai outfit." But there are also a number of variations. I chose the Chakkri style, which has a long narrow tube skirt (sinh) and an upper garment (sabai) that wraps around the chest and shoulder and trails down the back.
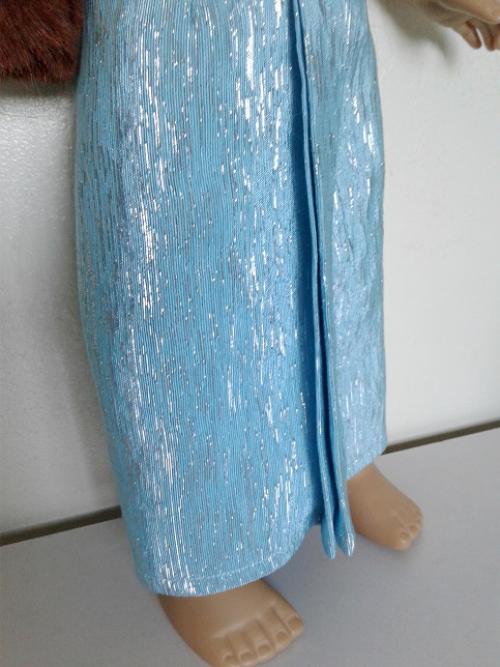
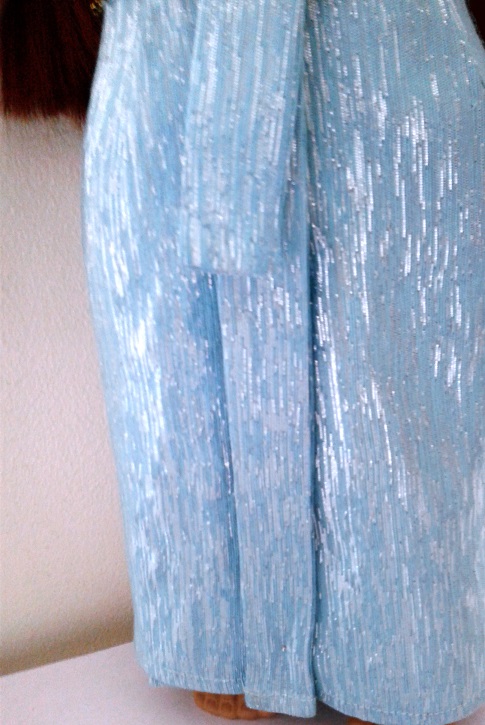
The skirt or sinh was somewhat simple to make. Unfortanately I didn't have any traditional brocade fabric to make it out of, but I used what I had and it turned out well enough. The sinh wraps around the waist and hips with two narrow pleats in the front (Na-Nang), and sometimes an additional narrow strip of fabric that loops under the belt. I was able to more or less construct it without much trouble.
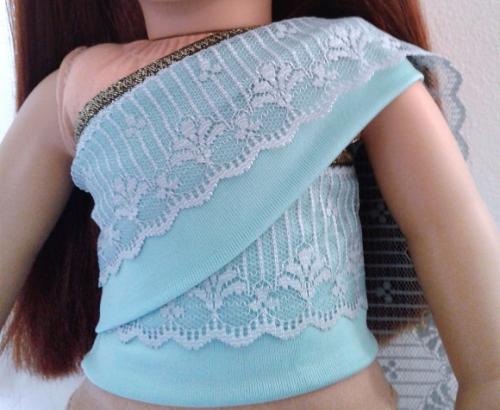
The sabai was a little trickier, at least for an 18" doll. To begin with, I didn't think the small size of a doll sabai, especially a woven/silk one, would wrap securely enough around a doll's chest, so I first tried to make it from this stretchy knit. I also added a strip of lace to drape over the shoulder.
Here I'm testing the fit on another Twinn, using gold trim as a temporary belt.
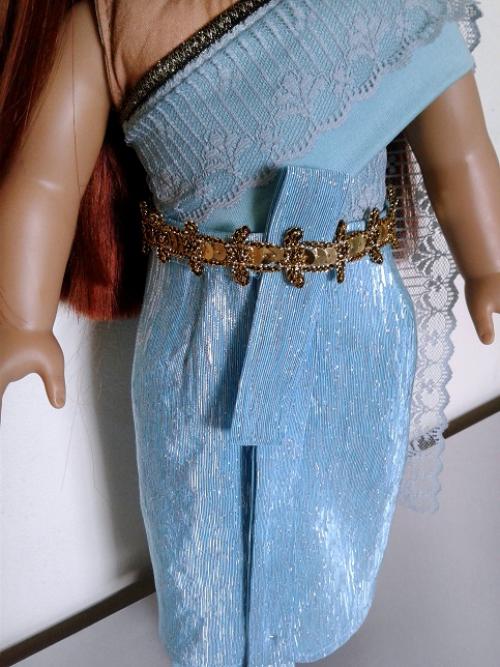
The stretch sabai turned out ok structurally, but I didn't think it looked authentic enough. So I remade the sabai in a satin version (revisiting the same fabric I used in Cai's Hanfu dress). It ended up working ok and the result was more genuine. It didn't hug the chest and shoulders as much as I would have liked, but I still preferred it over the stretch version. I added some gold trim to the front pleats to make the skirt stand out more.
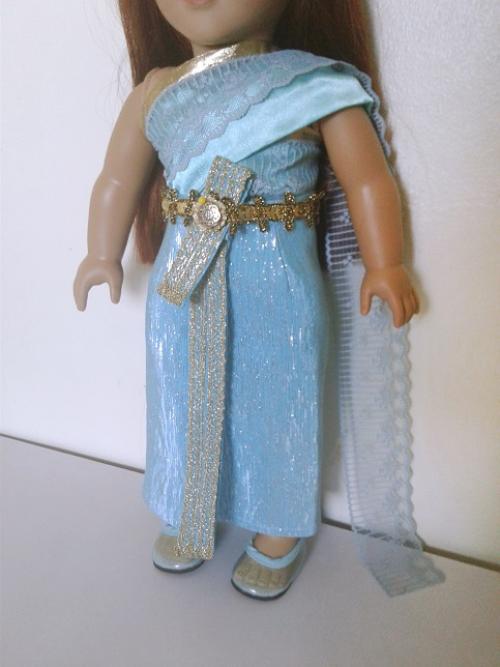
The sabai starts under one arm, wraps around once, then wraps over the shoulder and is pinned at the back on one side. The lace or extra fabric continues down the back, depending on the individual look, and sometimes goes to the floor.
All in all, the sinh and sabai were not as complex to make as Cai's Hanfu dress from the previous section, and they turned out reasonably well. I think I might do a few things differently next time, but I'm satisfied with the result.
I used some trimmed gold ribbon and a decorative button to make the final belt and buckle.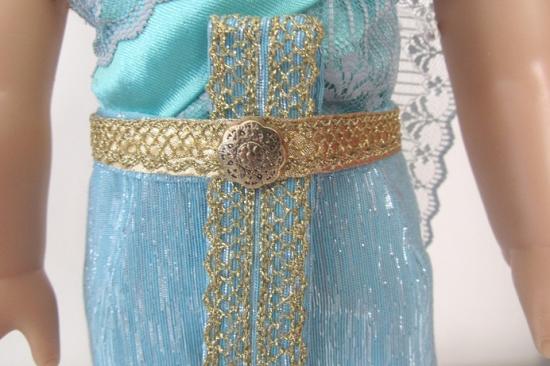
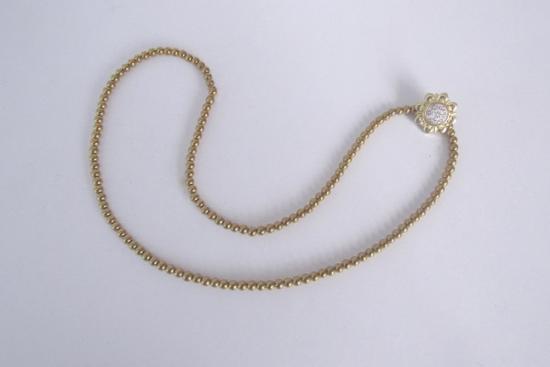
I had already made a pair of drop earrings for Pearl when I was working on Cai's jewelry, so I went ahead and made this necklace to go with them.
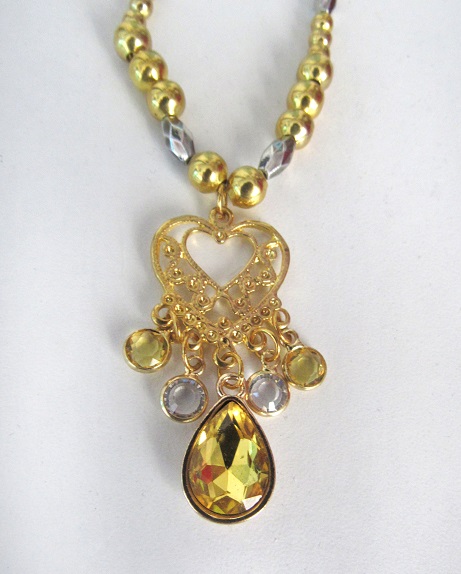
I also made this body chain (Sangwan), which is often worn with traditional Thai clothing. The body chain is worn over one shoulder and pinned to the sabai with a decorative brooch.
Finally, it was time for Pearl to get into her chut Thai.

For a traditional Thai style, the hair is usually worn up, at the top or the side of the head.
Colorful flowers or floral hair ornaments often decorate the hair. Since I didn't have either, I wrapped a leaf-shaped gold ribbon around Pearl's hair. In the future however I might try to create something more like this.
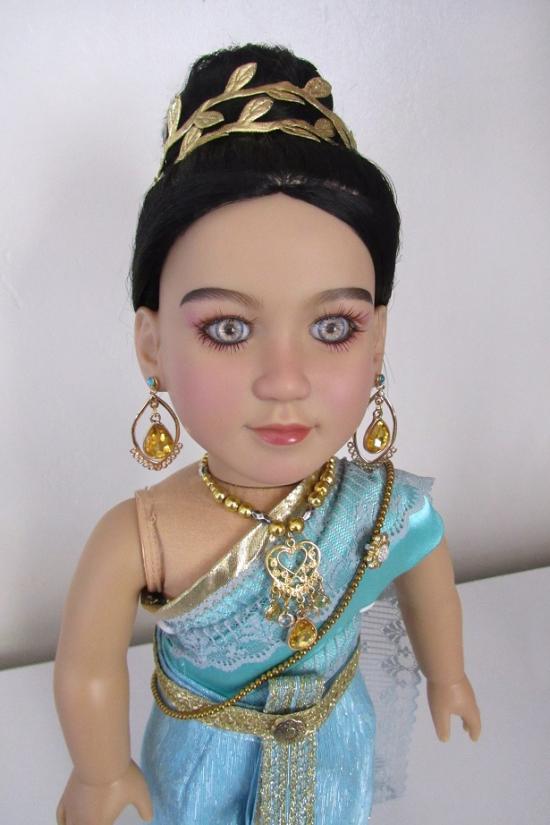
Actually what I really wanted was a Thai headdress for Pearl! I had no clue how to get one or even make one.
But I always wanted to make something clever from craft foam, so I figured this was the perfect opportunity to give it a try.
I used this costume headdress (from Thailand) as basis for making one for Pearl.
I sketched out a pattern, transfered it to a digital file, then used my Cricut to cut it out of craft foam.
I applied heat to shape it.
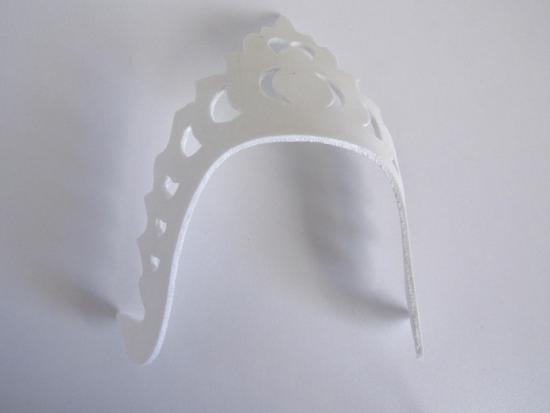
Then I used craft acrylics to paint it. . . But I wasn't happy with the uneven result. Start over.
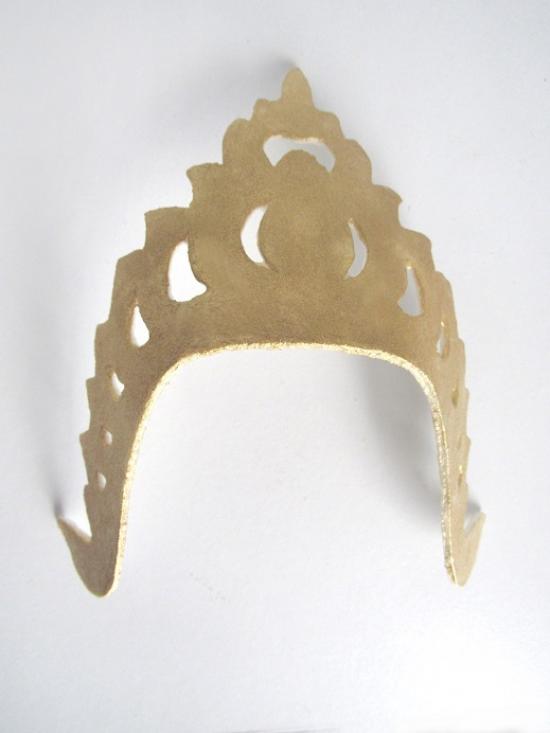
I then tried cutting the pattern from glittery craft foam so I wouldnt have to paint it. I tried embellishing it with gems to match the original. But the glitter headdress looked too much like, well, glitter. Start over again.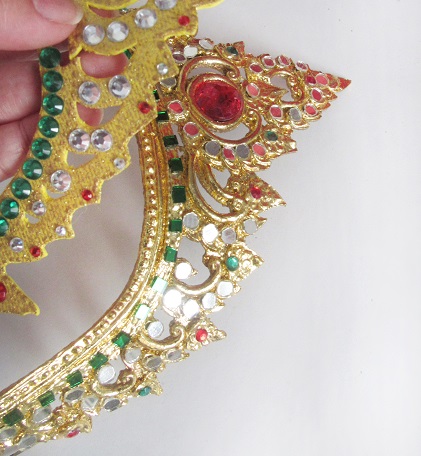
Finally, I had the idea to cut two headdresses, one from craft foam and one from metallic vinyl (to overlay the foam). It seems obvious now on hindsight.
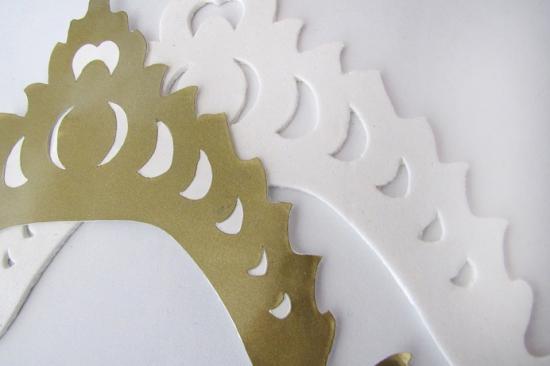
I added the gems, did a little hand embossing (which would have been better handled by the Cricut if I'd thought of it) and now Pearl is rocking her Thai headdress.
So the headdress took about 90% of the total time and effort to complete Pearl's look, but in the end I think it was worth it.
And with that, the My twinn Asian project is complete!
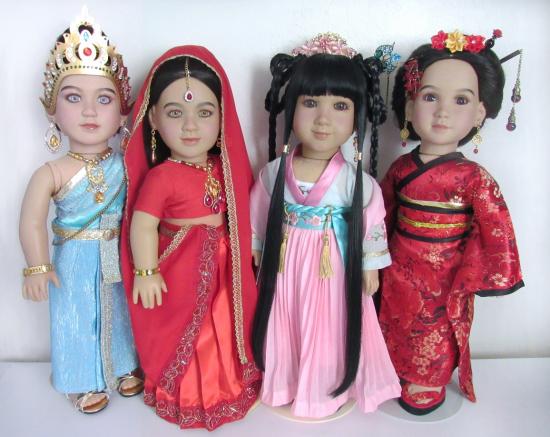
It's been the most challenging doll project I've done and totally the most fun. Along the way I learned a bit about Asian cultural clothing, and a little bit more about doll repair.
And it's amazing to me to see how far the girls have come.
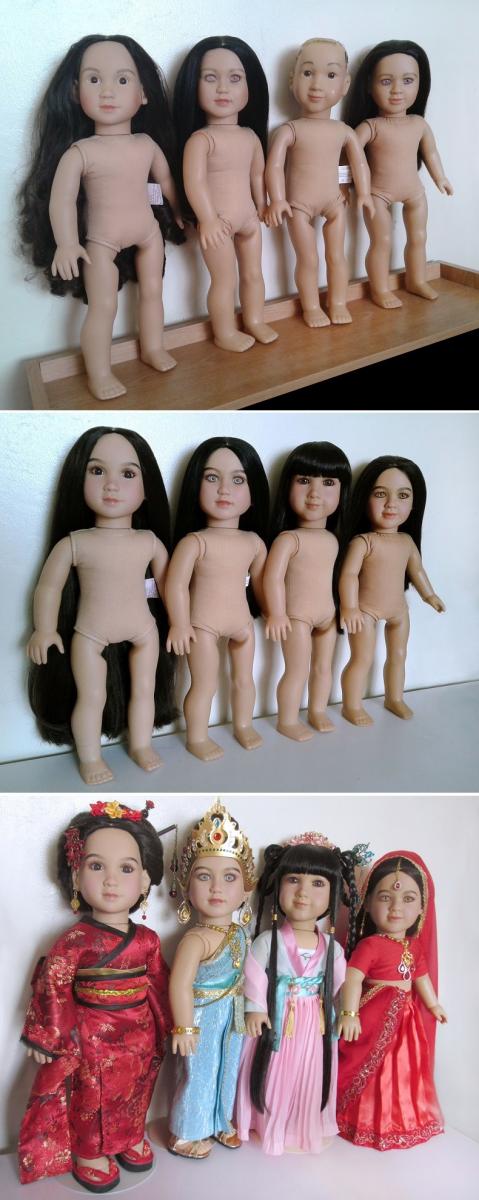
These cuties will most likely go to new homes in the coming days. (I'm still trying to work myself out of the doll avelanche I created several years ago when I started collecting every 18" doll on the planet.)
So if anyone is looking for a new (or not so new) 18" My Twinn with the name of Berkeley, Cai, Kim, or Pearl, keep an eye out on my blog here, or follow my Facebook page for annoucements.
Add new comment