Fixing Cai Part I

This week I'm working on My Twinn 18" Cai.
Cai was the last of the four Twins I collected for the My Twinn project I'm currently working on. She was the hardest to track down and it took me about two years to add her to the family.

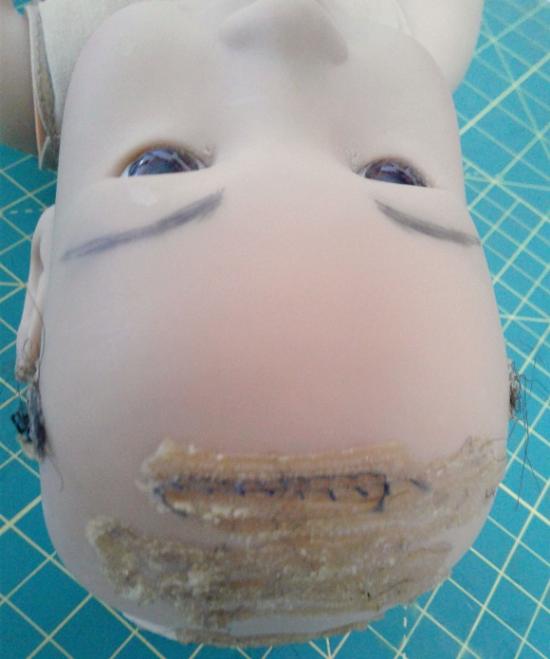
As you can see, she's not in the best shape she could be. When I got her, I found her wig was damaged; the wefts were coming undone and it seemed unsalvageable so I removed it. I don't know if the wig was original to her; I get the feeling it wasn't, but underneath the wig she had some messy factory glue, which was pretty thick and glumpy and didn't look like it planned to budge an inch. That was concerning.
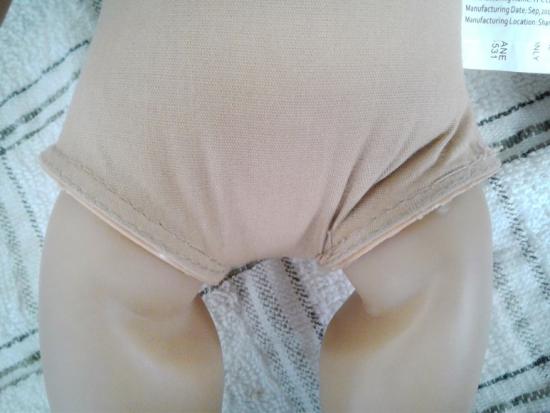
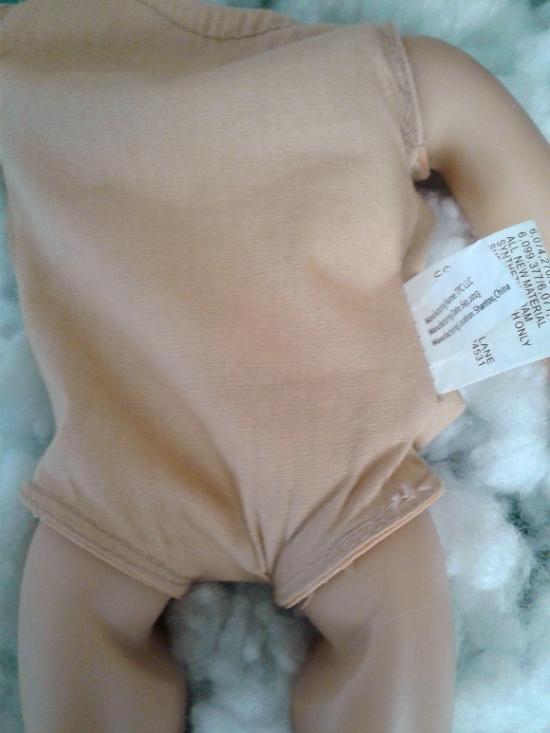
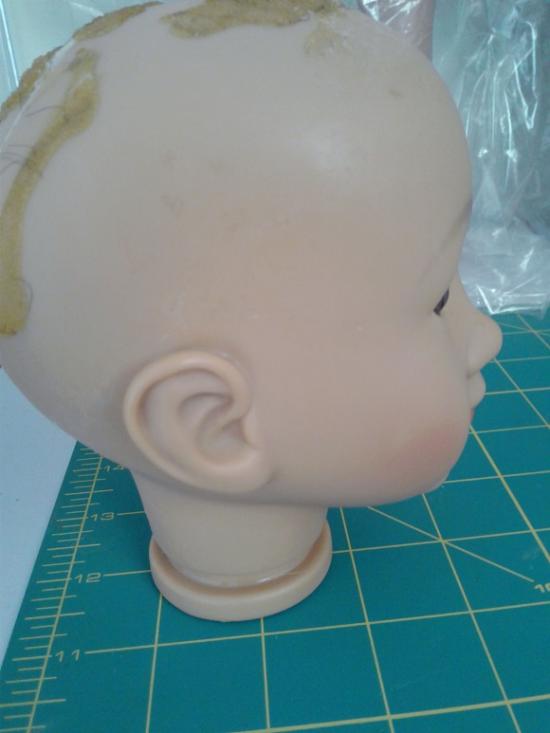
Cai's cloth body was fortunately clean with no rips or other problems, although one of the leg joints was a bit collapsed into her hip and she didn't stand well as a result. I figured I'd have to do some exploratory surgery to find out why.
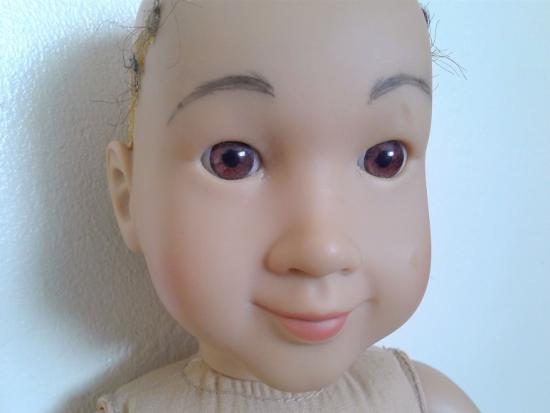
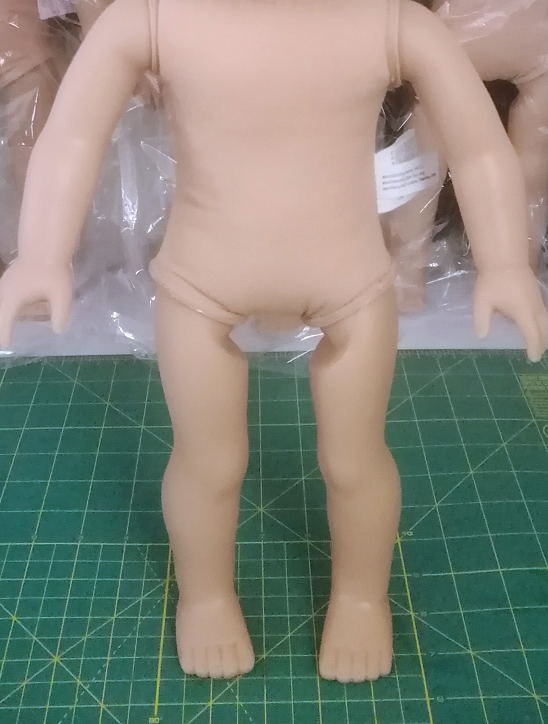
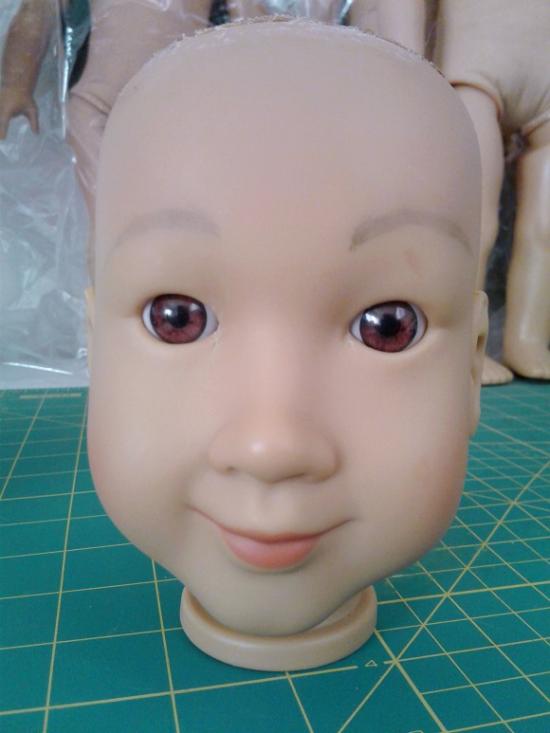
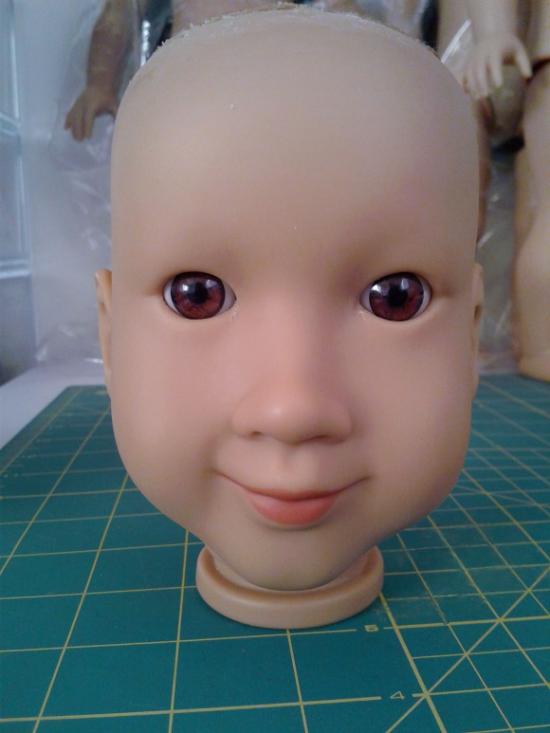
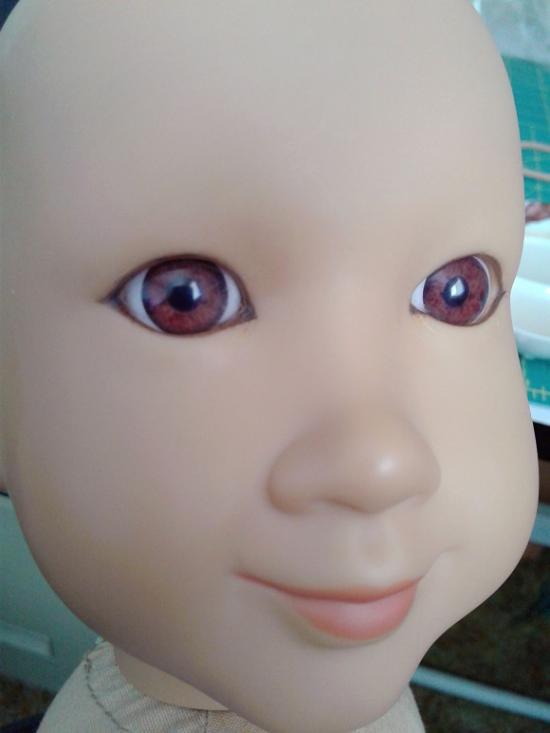
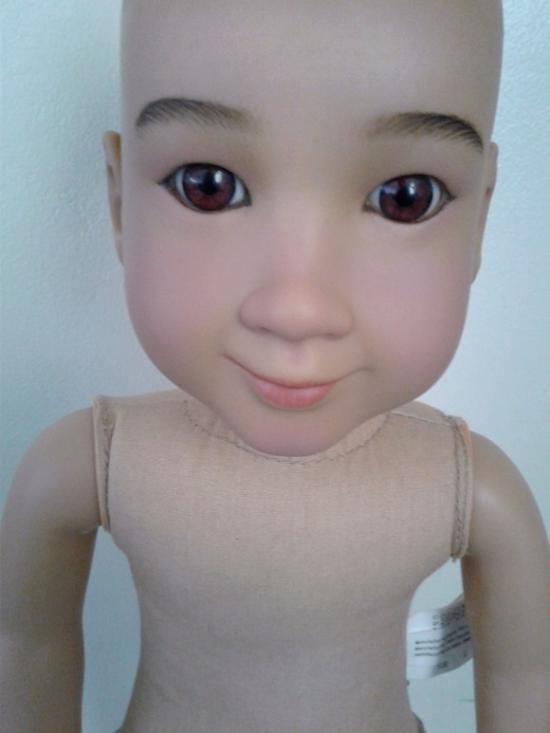
Her vinyl was for the most part in good shape, but her face had several dings, scratches, and shiny spots. Still, it was nothing that didn't look fixable. Her eyebrows were a bit slap dash, but I'd seen worse. Happily there were no marks or major discolorations on her limbs.
The real problem was the damage around her eyes.
I considered it might be an issue when I got her. But rather than pass her up, I decided I would see if I could work with this doll who had definitely seen better days.
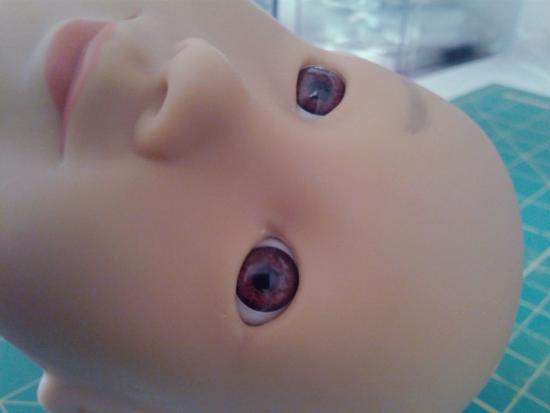
The damage around the eyes was concerning, but the vinyl wasn't actually cracked, which would have made her fairly irrepairable (at least for my skill level). The damage was more like small gouges that probably occured during her eye replacement with a sharp tool.
Call me crazy, but I figured the gouges might camoflauge with a little work. I was willing to try anyway. I guess I felt that Cai had potential and I wanted to see if I had the skill to prove it.
The first order of business was to have a look at her leg joint. I suspected the problem was simply that the stuffing had displaced or compressed, but I wanted to make sure it wasn't anything more serious. So off came her head and out came the stuffing!
Luckily her joints were fine; it was more a matter of uneven stuffing. I restuffed her, making sure to pad out the hip so she looked normal again and could stand more easily. This phase of Cai's recovery was easy!
Next, what to do about the cement on Cai's head?
Normally I don't bother too much with old glue on a doll's head. It can offer traction for a new wig and doesn't usually get in the way. But this glue was really lumpy, and it came down fairly low around Cai's head. I was worried a new wig might not cover as much of the same area and the glue would show. So I felt I had to try to remove at least some of it.
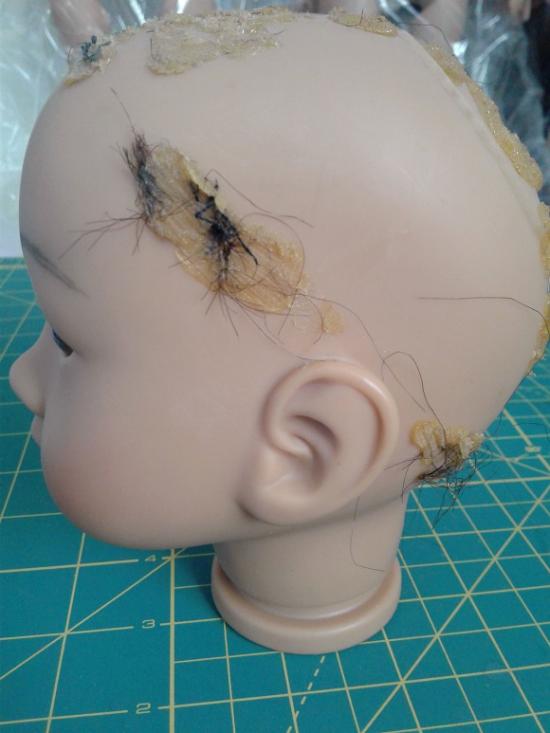
I tried soaking the top of Cai's head in hot water, but that didn't do much, other than maybe smearing the glue (and unexpectedly fading her eyebrows). I then tried to peal off the warm glue, but it was too sticky. Once it began to cool, the glue just turned to cement again.
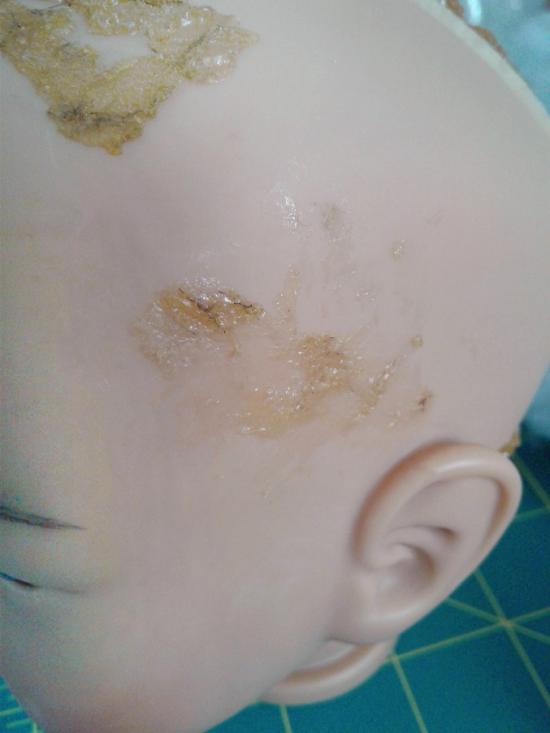
Then I tried some adhesive remover, which did actually start removing the glue around the sides of the head. But the old glue looked like it had actually melded with the vinyl in places, so that removing it was threatening to damage it. So I decided to just leave the rest of the glue alone. :/
Then I washed the head thoroughly to remove any traces of the adhesive remover. The wash nearly removed what was left of her eyebrows.
But this was no thing; I had planned on re-doing the eyebrows anyway. So I took my Magic Eraser and started removing Cai's remaining brows and her blush, meanwhile smoothing the shiny spots from her cheeks and forehead.
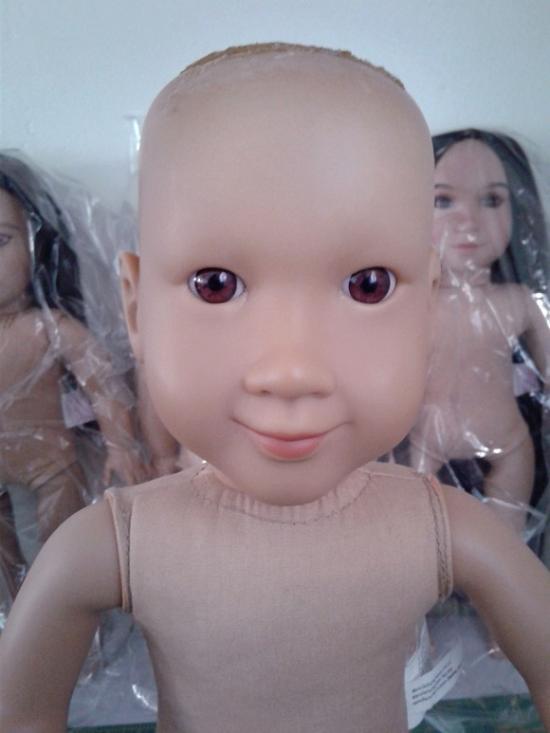
Then I reunited Cai's head with her body. She couldn't be happier.
The true problem here was the damage around Cai's eyes. How to fix it? I didn't know if I actually could!
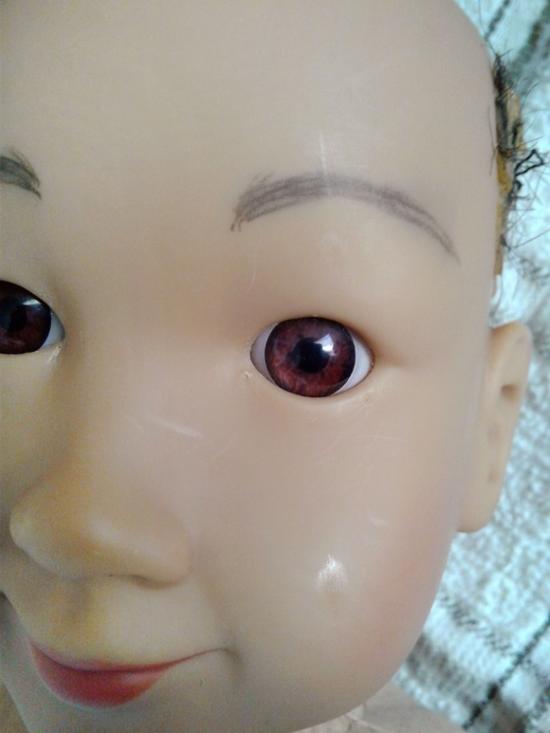
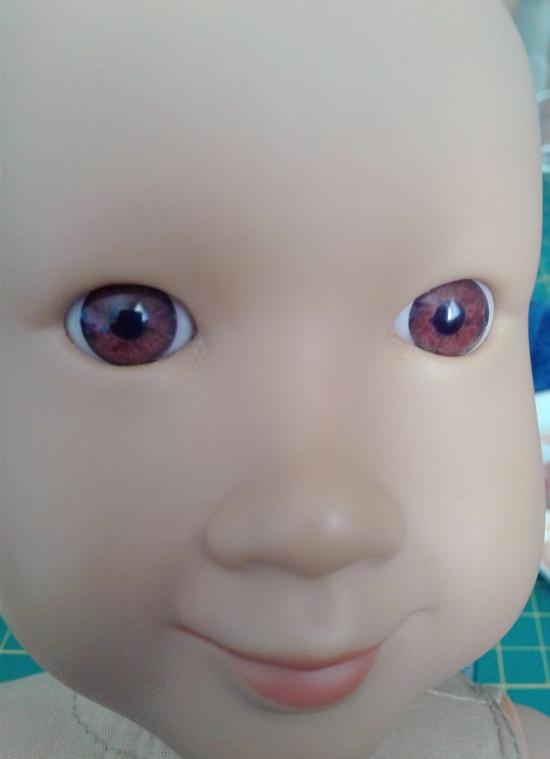
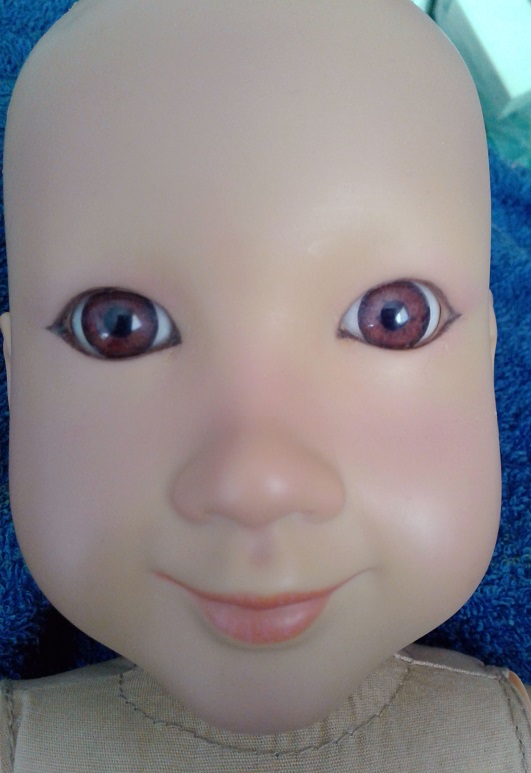
Some of Cai's charm for me was that she appeared to have been well-loved and played with, and received all the dings and boo-boos and honor that goes with it. :) Additionally, someone had cared enough about her to give her new eyes when the old eyes had likely faded.
The eyes were also quite beautiful. They were a vibrant brown color and looked very realistic. I kind of felt compelled to do this little doll some justice.
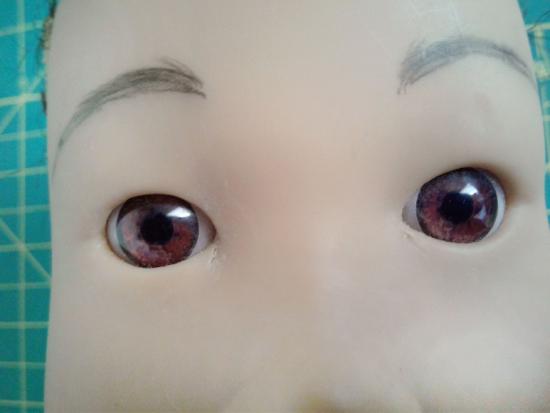
So I got down to business to see if I could make the scratches around her eyes less noticeable by "filling" them in a bit. Again, this was all kind of experimental and I didn't really know if it would work, but I took some vinyl adhesive and acrylic paint close to Cai's skin color, and "painted" in the scratches with it.
They didn't go away, but they looked a bit better.
I considered if I did another layer or two, they might have filled in more completely. But since I was mostly experimenting, I didn't know if I'd make the problem worse by continuing. So I left it there as it was.
Next I decided to outline Cai's eyes as I had done for Berk in my Fixing Berkeley post. I hoped the eyeliner would pull attention away from the scratches. . . I think it actually helped.
Then I returned a little color to Cai's face by giving her an all over sun-kissed blush in light pink. I added a little paint-texture to her lips as well.
Next--the eyebrows.
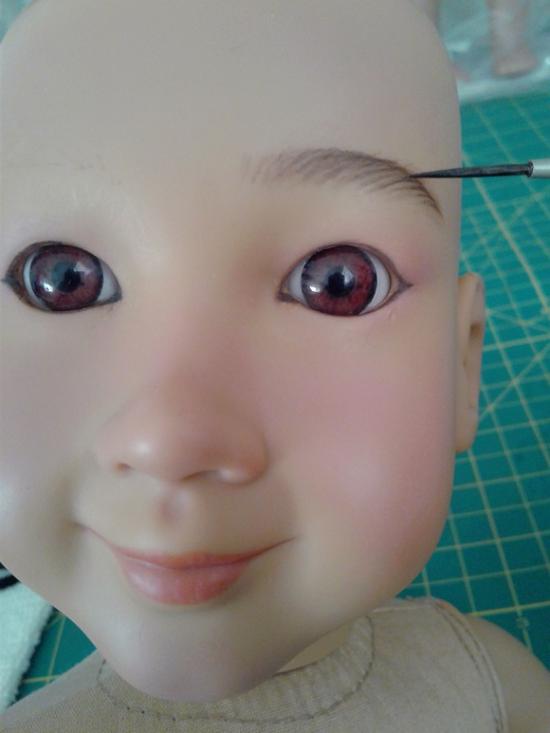
I'm not going to lie, this part always intimidates me. I don't consider myself a brilliant eyebrow artist. Even so, I like the way they turned out. They're a little bit uneven, which I think makes them look more natural. I can really see her coming to life!
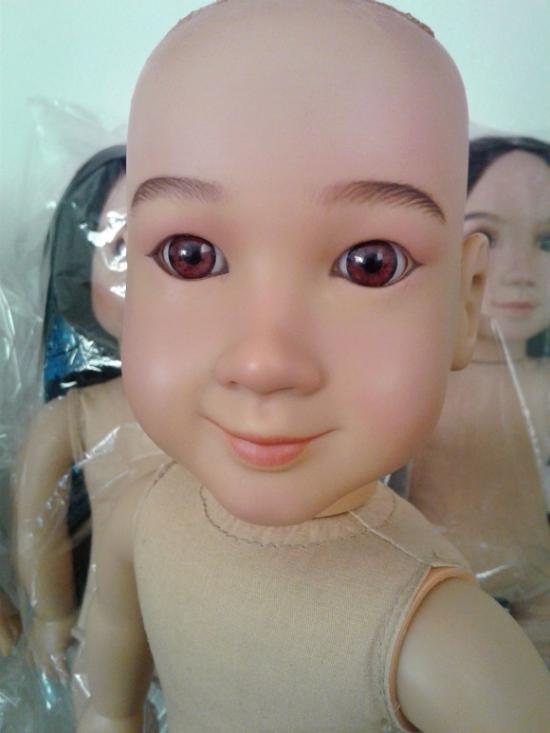
Finally I added a matte sealer on Cai's new face to reduce the shine and seal in the color.
As you can see by my increasingly grainy photos, I was running out of daylight, and Cai had to wait another day before my work on her could be done.
Stay tuned for my upcoming post on Cai's finishing touches, including getting her new eyelashes and new wig! This is the part that really starts to get fun. . .
Add new comment